
In this post, we will learn how to manage E-commerce Settings.
Follow Ecommerce Settings > Settings. Here you find many sections on the left side.
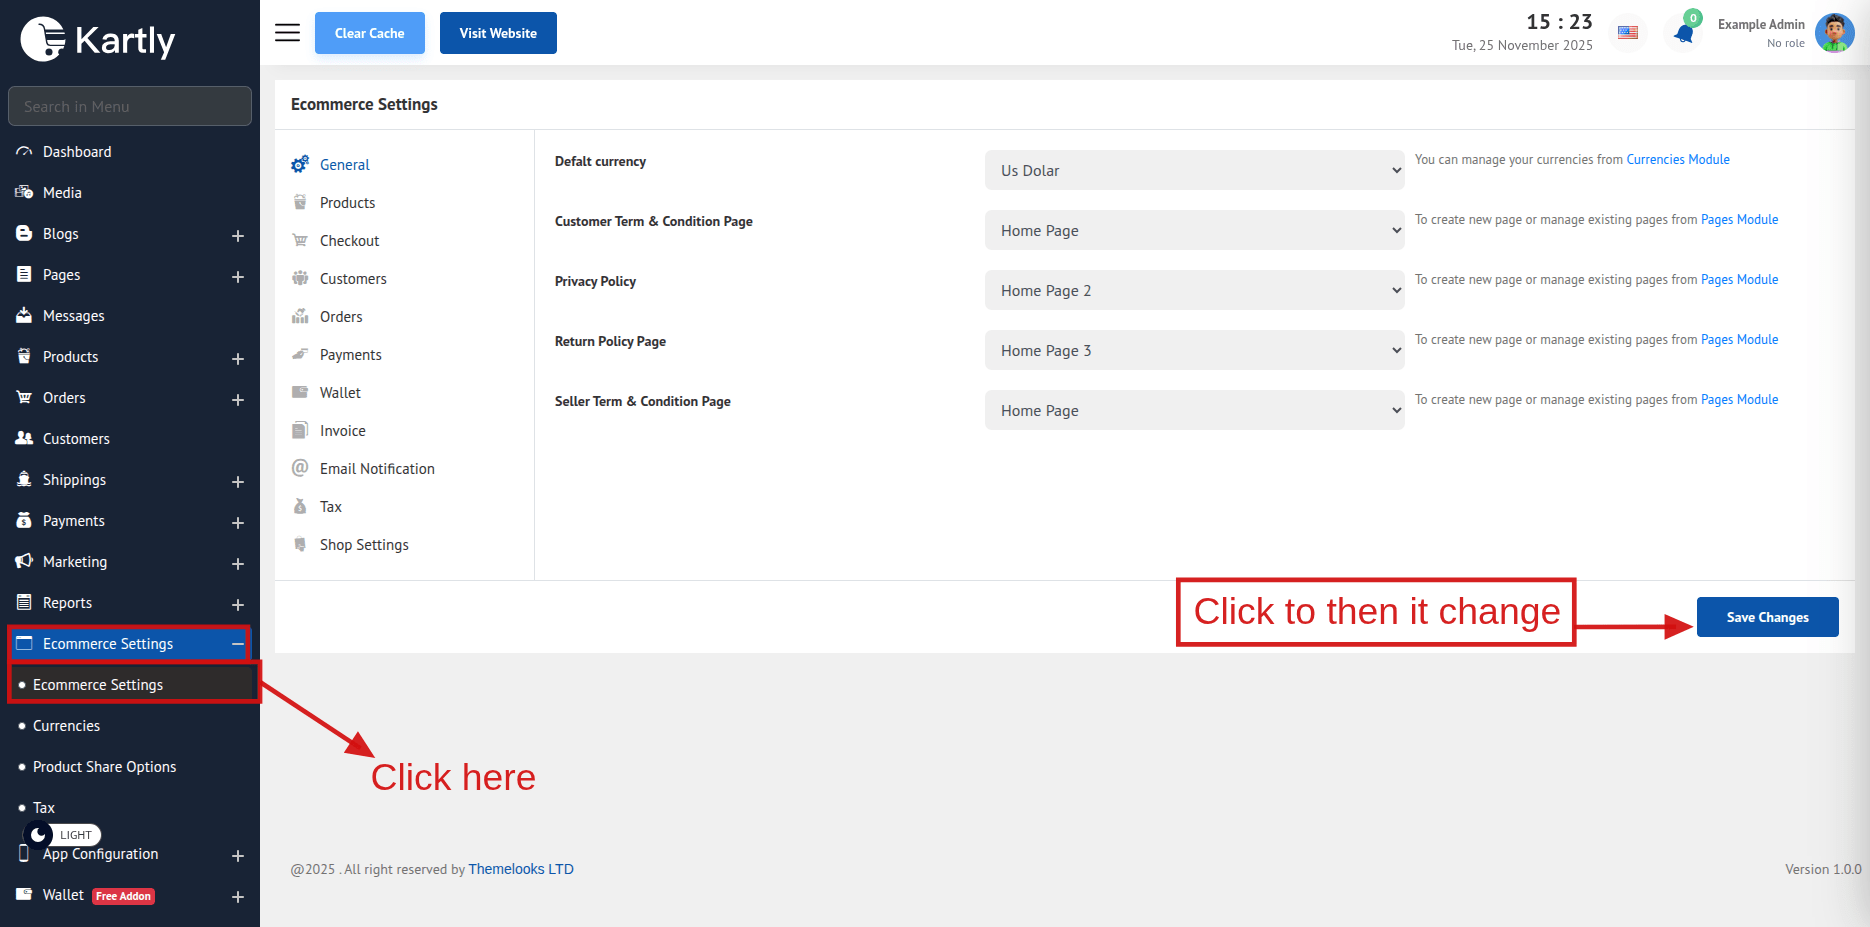
1. General Section:
Default Currency - Here you can set the default currency for your system.
Customer Term & Condition Page - Term and Condition Page for Customers when registering new customers.
Privacy Policy - If no page is available in the Select Privacy Policy dropdown, please create one first from Pages → Add New Page.
Return Policy - If no page is available in the Select Return Policy dropdown, please create one first from Pages → Add New Page.
Seller Term & Condition Page - Term and condition page for sellers when registering new sellers.
2. Products Section:
Enable Product Review - Here you can enable or disable the product review system.
Enable Star Rating On Product Reviews - Here you can choose whether the star rating system should be on product reviews or not.
Star Rating Should Be Required Not Optional - Here you can choose whether the star rating system should be required or not.
Show Verified Customer Label On Product Review - Here you can choose if you want to show a customer-verified label on product reviews or not.
Reviews Can Only Be Left By Verified Customers - Here you can choose if only verified customers can give reviews or if all customer can.
Enable Product Compare - Here you can choose if you want to show the product compare option.
Enable Product Discount - Here you can choose if you want to show a product discount or not.
Display Product Per page - Here you can set how many products to show on each page.
3. Checkout Section:
Enable Billing Address - Here you can choose to enable or disable the billing address system.
Use the shipping address as the billing address by default - If the billing address system is enabled then you can choose to set the shipping address as the billing address by default.
Enable guest checkout - Here you can choose whether the guest can checkout or not.
Hide Country, State, and City dropdown in Checkout - Choose if the Guest need to Give Country, State, and City or hide them. Also for Customers creating addresses. But the shipping option must be flat rate or product-wise.
Mandatory Post Code in Checkout - Here you can choose if Post Code is a must need or optional.
Create account in guest checkout - Here you can choose if you want to create an account for a guest when they checkout.
Send invoice to customer email - Here you can choose if an invoice must send to a customer email or not.
Enable coupon in checkout - Here you can choose if the coupon system should be implemented in checkout or not.
Enable multiple coupons in single order - Here you can choose if multiple coupons can be used on a single order.
Enable wallet in checkout - Here you can choose whether the wallet system should be implemented on checkout or not.
Enable order note - Here you can choose if an order note field should be in checkout or not.
Enable document in checkout - Here you can choose if the document system should be implemented in checkout or not.
Enable pickup point in checkout - Here you can choose if the pickup point system should be implemented in checkout or not.
Enable carrier in checkout - Here you can choose if the carrier system should be implemented in checkout or not.
Enable minimum order amount - Here you can choose if the minimum order amount should be set or not.
Minimum order amount - If the minimum order amount system is enabled, here you can set the minimum amount to order.
4. Customers Section:
Customer Auto Approval - If this option is enabled, and Email Verification is disabled then the customer will get auto-approved.
Customer Email Verification - If this option is enabled customers must be verified by email.
And if both of them are disabled that customer will be manually approved by Admin.
5. Orders Section:
Order Code Prefix - You can set the order prefix here.
Order Code Prefix separator - You can set the order prefix separator here.
Can Cancel Order within - You can set the expiry time to cancel an order in(Days, Hours, or Minutes). If nothing is set customers can cancel the order anytime they want.
Can Return Order within - You can set the expiry time to return an order in(Days, Hours, or Minutes). If nothing is set customers can return the order anytime they want.
6. Payments Section: Go to Payments > Payment Methods
7. Wallet Section:
Enable Online Recharge - Enable this option for wallet online recharge.
Enable Offline Recharge - Enable this option for wallet offline recharge.
Minimum Recharge Amount - You can set the minimum recharge amount for the wallet.
8. Invoice Section:
Business Email - Set your business email to show in the invoice.
Business Phone - Set your business phone to show in the invoice.
Business Address - Set your business address to show in the invoice.
Invoice and Shipping Label Logo - Set up your invoice and shipping logo.
Invoice paid Image - Payment paid image for the invoice.
Invoice Unpaid Image - Payment unpaid for the invoice.
9. Email Notification Section:
New Order Email Notification - Choose If you want to get an Email Notification on every New Order.
Order Refund Email Notification - Choose If you want to get an Email Notification on order Refund.
Order Cancel Email Notification - Choose If you want to get an Email Notification on Order Cancel.
Product Review Email Notification - Choose If you want to get an Email Notification on Product Review.
Wallet Recharge Email Notification - Choose If you want to get an Email Notification on Customer Wallet Recharge.
10. Tax Section: Enable Tax - Choose if Tax should be included in product checkout.
11. Shop Setting Section. This is the Admin Shop. Only if the Multivendor Plugin is Active.
Shop Name - The name of the shop.
Shop Link - The Shop Link.
Shop Logo - Admin Shop Logo.
Shop Banner - Admin shop banner.
Shop Phone - Admin Shop Phone number
Shop Address - Admin Shop Address.